Projects in Studio
Each Doodle Studio project is a complete Doodle Engine game stored in its own folder.
This page assumes Doodle Studio is installed. You can create and edit a project without additional tools. Preview and Build also require Node.js and the project dependencies covered under Install project dependencies.
Create a project
Section titled “Create a project”Select New project… on the Welcome screen, or open the File menu and select New Project….
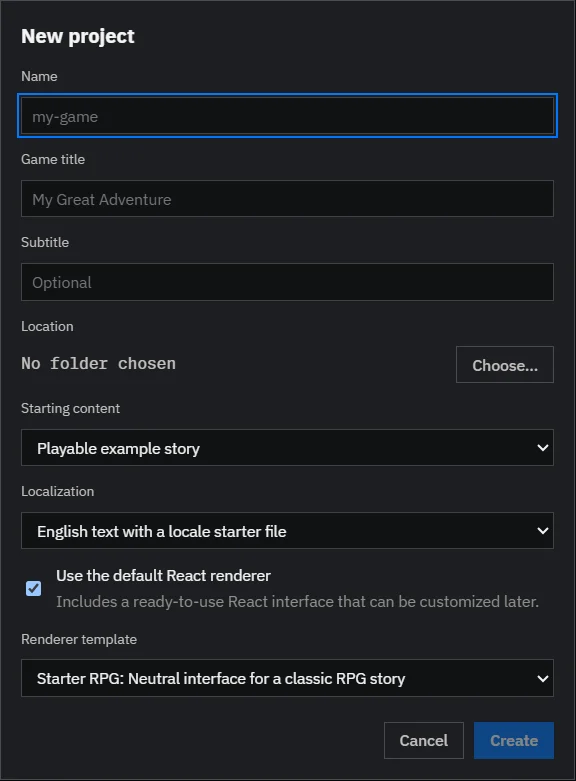
| Field | What it controls |
|---|---|
| Name | Folder name and npm package name. |
| Game title | Player-facing title in the browser tab and default React renderer. |
| Subtitle | Optional line beneath the title in the default React renderer. |
| Location | Parent folder where Studio creates the project folder. |
| Starting content | Begin with the playable example story or one starting location. |
| Localization | Start with English written directly in the editor, or include an English and Swedish localization example. |
| Default React renderer | Includes a ready-to-use React interface that can be customized later. |
| Renderer template | Chooses the initial theme for the game shown in Preview. |
Choose the starting content
Section titled “Choose the starting content”Choose Playable example story to begin with a small connected game. Explore it to see how a location, its characters, and their conversations connect to the rest of the story. Replace the examples as you build your own game.
Choose Minimal project with one starting location when you are ready to begin with your own ideas. The project opens with one valid location and empty sections for the rest of your content.
Write the text directly
Section titled “Write the text directly”The starting content and localization choices work together in any combination.
Choose English text with a locale starter file for your first project. Character names, descriptions, dialogue lines, and choices appear directly in Studio exactly as the player will read them.
The English locale starter remains available for later. When your game needs another language, follow Add localization to move text into translation keys one section at a time.
Choose English and Swedish localization example when you specifically want to study an already-localized project.
Choose the game theme
Section titled “Choose the game theme”In the New Project window, use Renderer template to choose Starter RPG, Minimal, Prose, or Fable. This changes the game shown in Preview. It does not change the colors used by Doodle Studio itself.
See Game Shell styling for title and dialogue screenshots of all four renderer themes. To change Studio’s own colors, see Studio themes.
Open a project
Section titled “Open a project”Select Open project…, then choose the project root: the folder containing package.json, content/, and src/.
The project opens in the Studio workspace.
Change the game theme
Section titled “Change the game theme”You can change the renderer theme after creating a project:
- Select Overview in the left sidebar.
- Find Project setup.
- Choose a theme from Renderer template.
Studio updates the theme and installs any fonts it needs. Your changes in src/renderer-overrides.css remain in place. Projects with a custom renderer show Custom renderer instead of the theme menu.
Install project dependencies
Section titled “Install project dependencies”A new project needs its Node.js packages before Preview and Build can run. When Studio displays the dependency banner, select Install dependencies and wait for it to finish.
This step needs Node.js 24 or newer installed on your computer. The installation page covers it.
Reopen recent work
Section titled “Reopen recent work”The Welcome screen lists projects you opened recently. Select one to continue working on it.
You can also open the File menu and select Open Recent.